Bathroom Wainscoting Ideas and Cost: Styles, Heights, and Materials (2026)
Styles, heights, materials, and real 2026 costs for bathroom wainscoting that looks custom and survives the humidity.

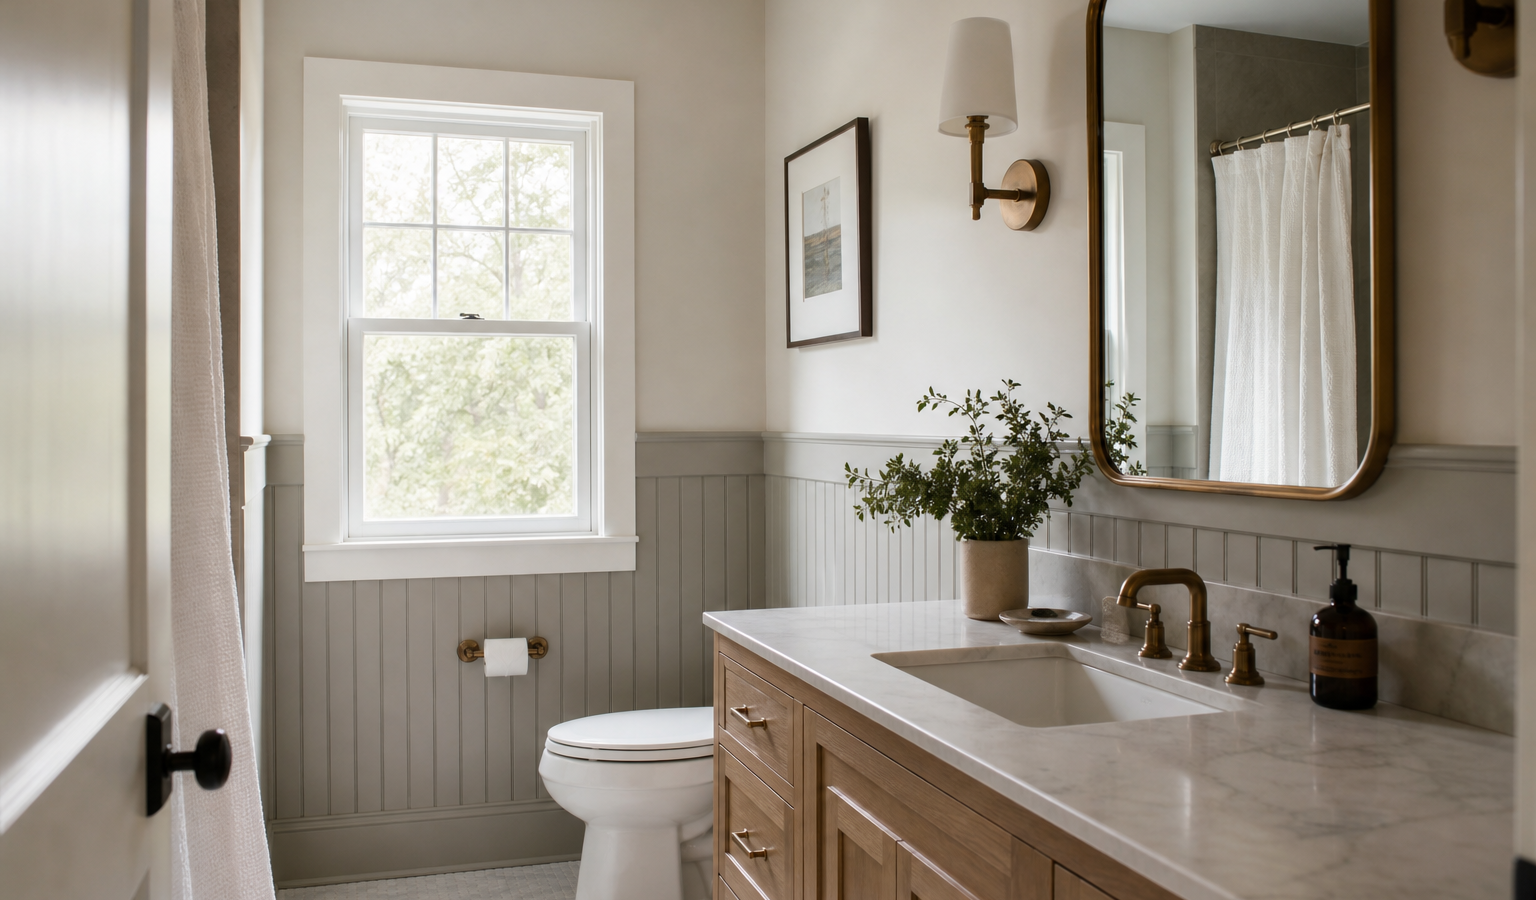
Bathroom wainscoting ideas range from classic white beadboard to tall board-and-batten, horizontal shiplap, and formal raised panels, and most cost $7 to $40 per square foot installed, or about $1,000 to $4,000 for a typical bathroom. Beyond the look, wainscoting protects the lower wall from splashes and humidity, which is exactly why it has lived in bathrooms for a century. This guide covers every style, the moisture-smart materials that survive a bathroom, the right height to install it, and real 2026 costs.
Wainscoting is decorative paneling applied to the lower portion of a wall, usually topped with a chair rail or cap. In a bathroom it does double duty: it adds architectural character to a plain box of a room and shields the most splash-prone surface from water and scuffs. Done in the right material and sealed properly, it is one of the highest-impact, lowest-cost upgrades you can make. Pair it thoughtfully with your bathroom paint colors and it transforms the space.
Key takeaways
- Bathroom wainscoting costs $7 to $40 per square foot installed, or roughly $1,000 to $4,000 per bathroom.
- Beadboard is the most popular and budget-friendly style; raised panel is the most formal and costly.
- Use moisture-resistant materials, PVC or cellular vinyl near wet zones, primed MDF or wood elsewhere.
- Standard height is 32 to 42 inches; three-quarter height (48 to 54 in) is a modern favorite.
- Prime all sides, caulk every seam, and finish with semi-gloss paint to beat humidity.
What bathroom wainscoting is and why it works
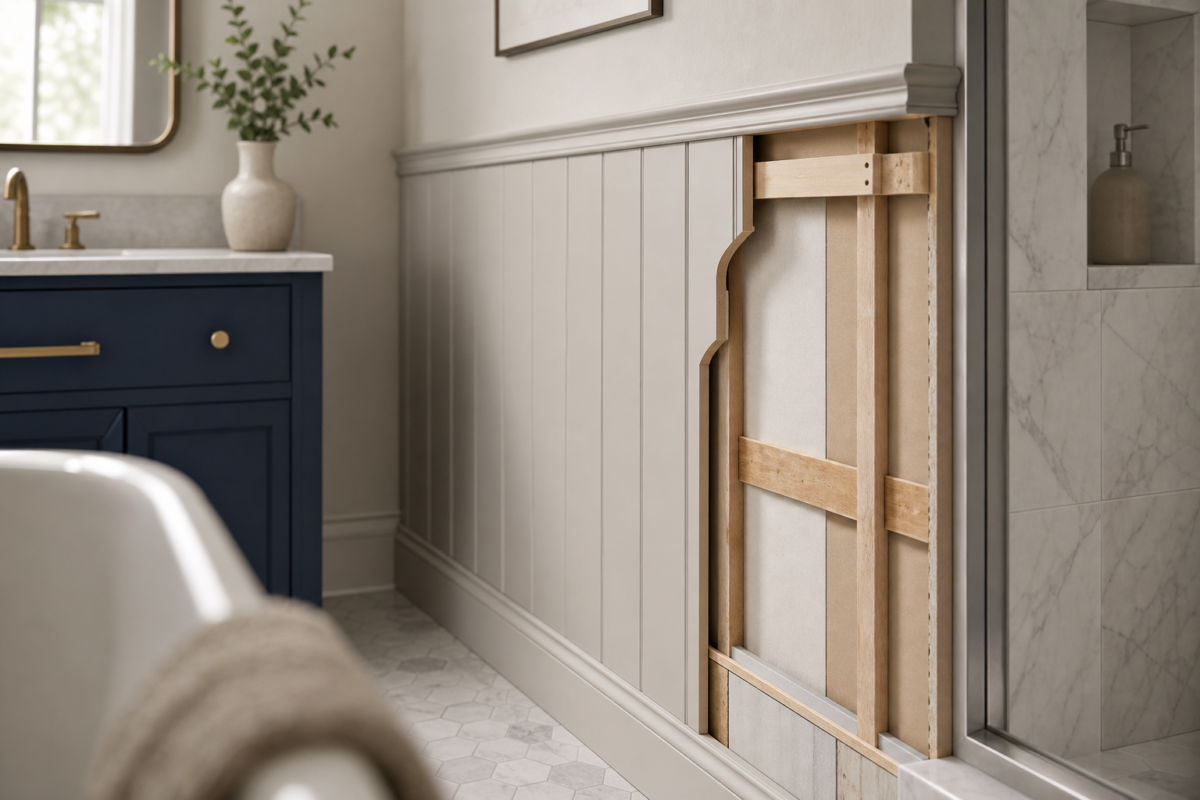
Bathroom wainscoting is paneling installed on the lower wall, typically 3 to 4 feet high, that protects against splashes and humidity while adding character. It works in bathrooms because it combines a practical, washable lower surface with a design detail that makes a small room feel finished.
Historically, wainscoting kept damp and cold away from plaster walls. In a modern bathroom the logic holds: the lower wall takes the most abuse from splashing, towel racks, and condensation, and a durable, water-shedding panel there outlasts painted drywall. It also creates a natural two-tone wall, a painted or paneled bottom and a different color or wallpaper on top, that reads as intentional, custom design. For small spaces especially, see how it plays in our powder room ideas. And because it draws the eye to a horizontal line, well-placed wainscoting can make a cramped bathroom feel more balanced and a tall, boxy one feel cozier.
Bathroom wainscoting ideas by style
The most popular bathroom wainscoting ideas are beadboard, board and batten, shiplap, raised panel, and flat (Shaker) panel, each setting a different tone from cottage to formal. Your choice drives both the look and the cost.
Beadboard
Beadboard is the classic bathroom look: narrow vertical planks with a rounded ridge (the bead) between them. It is affordable, widely available in sheets or tongue-and-groove planks, and reads cottage or farmhouse. Sheet beadboard is the easiest DIY and the cheapest at roughly $7 to $15 per square foot installed.
Board and batten
Board and batten uses a flat base with vertical battens spaced evenly over it, creating a clean, architectural grid. It suits modern farmhouse and transitional baths, looks great at taller heights, and runs about $10 to $25 per square foot installed.
Shiplap
Horizontal shiplap boards with slight reveal lines give a relaxed, coastal feel and visually widen a narrow bathroom. Use moisture-resistant boards and seal the gaps well, since horizontal ledges can catch water. Expect $8 to $20 per square foot installed.
Raised and flat panel
Raised-panel wainscoting, with framed, beveled panels, is the most traditional and formal option and the priciest at $20 to $40 per square foot installed. Flat or Shaker panel offers the same framed look with a simpler recessed center, a cleaner, slightly cheaper choice that fits both classic and modern baths. Picture-frame or overlay wainscoting, applied molding rectangles over the existing wall, splits the difference: it delivers much of the paneled look for less material and labor, and is a favorite DIY approach because it needs no sheet goods, just trim, glue, and careful measuring.
Tile wainscoting
For true wet areas, tile wainscoting, subway or picture-frame tile run to chair-rail height, is the most waterproof option of all. It costs more and overlaps with your bathroom tile budget, but it is unbeatable behind a sink or along a tub.
Bathroom wainscoting cost in 2026
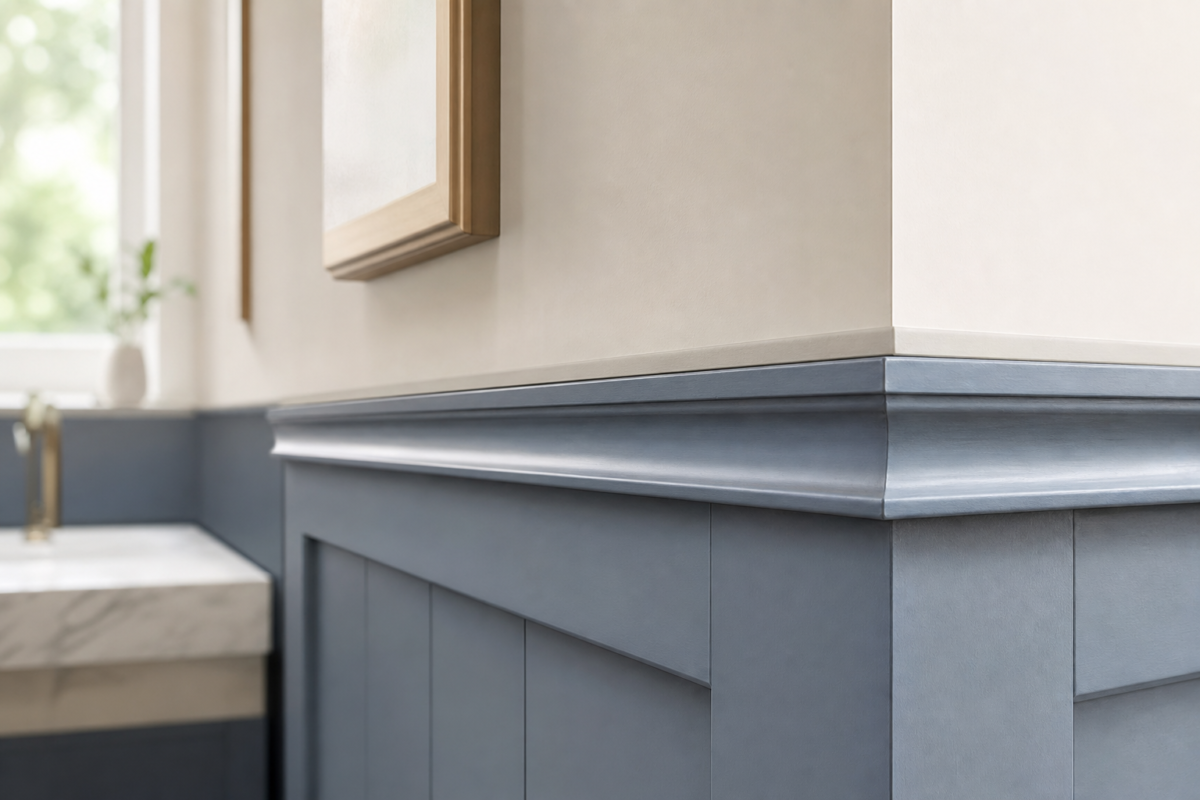
Bathroom wainscoting costs $7 to $40 per square foot installed in 2026, with materials alone running $1 to $20 per square foot and labor adding $4 to $12. A typical bathroom project lands between $1,000 and $4,000 depending on style, material, and height.
| Style | Material cost | Installed cost | Vibe |
|---|---|---|---|
| Sheet beadboard | $1 – $5 / sq ft | $7 – $15 / sq ft | Cottage, budget |
| Plank beadboard | $3 – $8 / sq ft | $9 – $18 / sq ft | Classic, textured |
| Board and batten | $3 – $10 / sq ft | $10 – $25 / sq ft | Modern farmhouse |
| Shiplap | $2 – $8 / sq ft | $8 – $20 / sq ft | Coastal, casual |
| Raised panel | $8 – $20 / sq ft | $20 – $40 / sq ft | Formal, traditional |
| Tile wainscoting | $5 – $25 / sq ft | $15 – $45 / sq ft | Waterproof, premium |
Doing it yourself with sheet beadboard can cut a project to a few hundred dollars in materials, making wainscoting a favorite of our budget bathroom remodel readers. For where it fits in a larger renovation, see the full bathroom remodel cost breakdown. Labor is the swing factor: a simple sheet-beadboard run goes up in a day, while intricate raised panel or a tiled wainscot can take a skilled carpenter or tile setter two to three days, which is where the upper end of the per-square-foot range comes from.
Best materials for a bathroom
The best wainscoting materials for a bathroom are PVC and cellular vinyl for wet zones, and primed MDF, plywood, or solid wood for drier areas. The humidity and splashing in a bathroom punish the wrong material, so match the material to the location.
PVC and cellular vinyl
PVC and cellular-vinyl paneling are fully waterproof, will not rot, warp, or grow mold, and paint well. They are the smart choice near the tub, shower, and sink, and in full bathrooms with heavy use. They cost a bit more than MDF but eliminate moisture worry.
MDF
Primed MDF is inexpensive, smooth, and takes paint beautifully, but it swells permanently if it gets wet. Use it only in powder rooms or on walls away from direct water, and seal every cut edge. Many pre-made wainscoting kits are MDF; they are fine in low-moisture baths.
Solid wood and plywood
Real wood and marine-grade plywood look authentic and hold up when properly sealed on all sides, but they cost more and demand careful finishing. They suit higher-end projects where you want genuine material and are willing to maintain the finish.
A quick material cheat sheet
Match the material to the wall: PVC or cellular vinyl within 2 feet of water, primed MDF or a pre-made kit in a powder room or on a dry wall, and solid wood or marine plywood when budget and craftsmanship allow. Avoid raw MDF anywhere it can get splashed, and never install any wood product that has not been sealed on the back, the side you will never see is the one that absorbs moisture from the wall cavity and warps first.
How high should bathroom wainscoting be?
Standard bathroom wainscoting height is 32 to 42 inches, with 36 inches (chair-rail height) the most common. Three-quarter height at 48 to 54 inches is a popular modern look, and full height to 60 inches or above the tile line gives maximum protection and drama.
As a rule of thumb, wainscoting looks best at roughly one-third the wall height, which is where the classic 32 to 36 inch standard comes from. But taller installations are trending: running board and batten or beadboard to 48 or even 60 inches makes a small bathroom feel taller and shields more wall. In wet zones, align the top of the wainscoting with the top of any tile or extend it above the splash line. Keep the cap or chair rail from colliding with your vanity, mirror, and vanity height for a clean, intentional line.
Installation, sealing, and beating moisture
Successful bathroom wainscoting comes down to a waterproof-friendly material, all-sides priming, and meticulous caulking, because any unsealed seam lets humidity in and invites warping and mold. This finishing work matters more than the paneling itself.
- Choose PVC or cellular vinyl within 2 feet of the tub, shower, or sink.
- Prime the front, back, and every cut edge before installation.
- Caulk all seams, the top cap, and the bottom where it meets the floor or baseboard.
- Finish with a mildew-resistant semi-gloss or satin paint for a wipeable surface.
- Run the exhaust fan during and after showers to control humidity.
- Leave a small gap at the floor for expansion, then caulk to seal it.
Ventilation is the quiet hero. The EPA guidance on bathroom moisture and mold stresses that controlling humidity is the key to preventing mold, so a properly vented fan protects your wainscoting as much as any sealant. Good EPA indoor air quality resources practices, running the fan and keeping surfaces dry, extend the life of any wall finish.
Contractor’s take
The wainscoting failures I get called to replace almost always come down to two shortcuts: MDF installed next to a tub, and unsealed cut edges. MDF is lovely in a powder room and a disaster in a splash zone, it drinks water and puffs up like a sponge. Near any wet area I use PVC trim board and PVC beadboard, prime everything including the back, and caulk every single joint before paint. It costs a little more up front and it never calls me back. And do not skip the exhaust fan; the best paneling in the world cannot survive a bathroom that stays foggy for an hour after every shower.
Design ideas: pairing color, pattern, and finish
The strongest bathroom wainscoting designs pair a crisp painted lower panel with a contrasting wall color, wallpaper, or tile above, creating a deliberate two-tone wall. Coordinating the cap, trim, and hardware ties the whole room together.
Classic white or soft greige beadboard under a moody blue or green upper wall is a reliable winner. For a bolder look, paint the wainscoting itself a saturated color and keep the upper wall light. Wallpaper above wainscoting is having a moment, protected from splashes below by the durable panel. Match the sheen and undertone of your trim to the wainscoting, and echo the style elsewhere, shaker wainscoting with shaker cabinetry, for example, so the room feels designed rather than decorated. Coordinate with your bathroom flooring tones for a cohesive palette from floor to cap. A final tip: carry the wainscoting around the whole room, including behind the door and into alcoves, rather than stopping it on one wall, so the detail feels architectural rather than like an afterthought.
Your next move
You know the number. What are you deciding next?
Walk-in tub cost in 2026: $5,000 to $20,000 installed. Compare tub types, features, and the real Medicare coverage…
Continue →Bathroom remodel financing explained: compare home equity loans, HELOCs, cash-out refi, personal loans, and 0% cards with 2026…
Continue →Steam shower cost runs $3,000 to $10,000 installed in 2026. See prices by generator size, enclosure, and prefab…
Continue →Frequently asked
How much does it cost to install wainscoting in a bathroom?
Expect $7 to $40 per square foot installed in 2026, or roughly $1,000 to $4,000 for a typical bathroom. Sheet beadboard is cheapest; raised-panel and tile wainscoting cost the most. DIY with sheet material can drop materials to a few hundred dollars.
What is the best wainscoting material for a bathroom?
PVC or cellular vinyl is best for wet zones because it is waterproof and will not rot or warp. Primed MDF and solid wood work in drier areas or powder rooms if every edge is sealed and the room is well ventilated.
How high should bathroom wainscoting be?
Standard height is 32 to 42 inches, with 36 inches most common. Three-quarter height (48 to 54 inches) is a popular modern choice, and full height above the tub splash line gives the most protection.
Is wainscoting a good idea in a bathroom?
Yes. It protects the splash-prone lower wall from moisture and wear while adding architectural character. The key is using moisture-resistant material near wet areas and sealing every seam against humidity.
Can I install bathroom wainscoting myself?
Yes, especially sheet beadboard or a simple board-and-batten layout. The critical steps are priming all sides, caulking every seam, and using a waterproof material near water. Raised-panel and tile wainscoting are better left to a pro.

Cost ranges reflect 2026 US material and installed figures for common wainscoting styles.