Bathroom Subfloor Waterproofing: Costs, Materials, and How to Do It Right (2026)
The layered system that keeps water out of your floor framing, with real 2026 costs, material comparisons, and a pro install sequence.

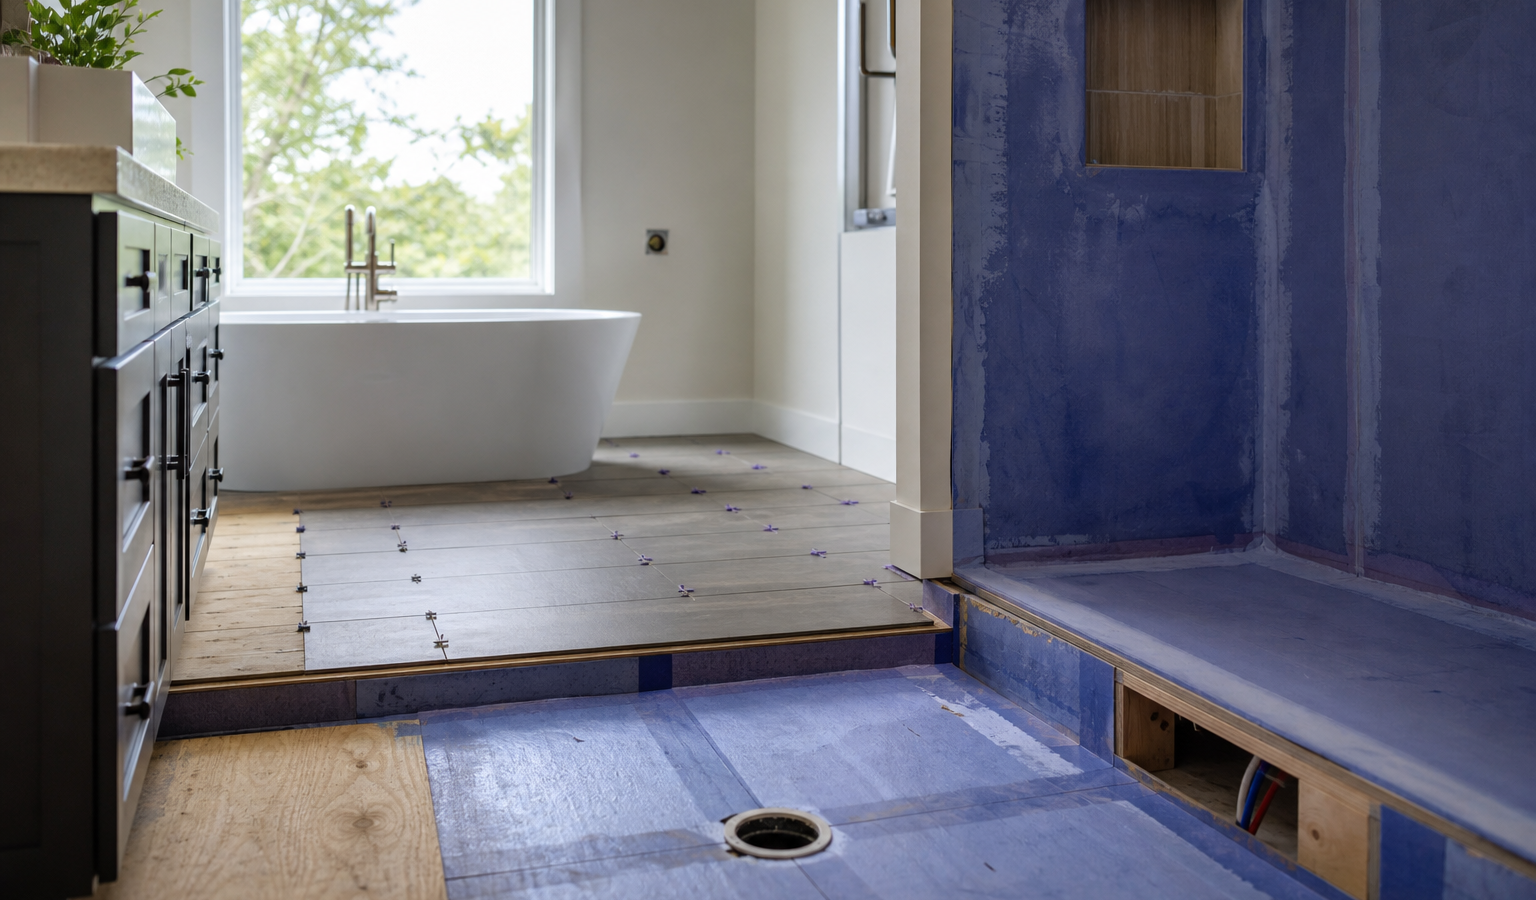
Bathroom subfloor waterproofing is the layered system of structural decking, backer or membrane, and sealant that keeps water from ever reaching the wood and framing beneath your floor. Get it right and a tile floor lasts 30 years; get it wrong and a hidden leak rots joists, grows mold, and turns a cosmetic remodel into a structural repair. This 2026 guide walks through what a subfloor actually is, the materials that keep it dry, real installed costs, and the step order a pro follows so your bathroom floor stays solid and sealed.
Most homeowners never think about what sits under the tile until a toilet flange leaks or a grout line starts flexing. By then the damage is done. Waterproofing is cheap insurance measured against a $3,000 to $8,000 subfloor rebuild, and it is the one part of a bathroom you cannot fix without tearing out everything on top of it. If you are planning any floor work, budget and sequence this first. For the bigger picture on where this fits, see our bathroom remodel cost breakdown.
Key takeaways
- Expect $500 to $2,500 to waterproof a bathroom floor, or $3 to $10 per square foot installed including backer and membrane.
- The subfloor is the structural deck (plywood or concrete); the waterproofing is a separate layer on top of it (cement board, uncoupling membrane, or liquid).
- Tile needs floor stiffness of L/360 deflection for ceramic and L/720 for natural stone, or it cracks.
- A liquid membrane like RedGard or a sheet system like Schluter Kerdi/Ditra is what actually stops water, not the backer board alone.
- Waterproofing the shower pan and curb is non-negotiable; the open floor is lower risk but still worth sealing.
What a bathroom subfloor is and why waterproofing matters
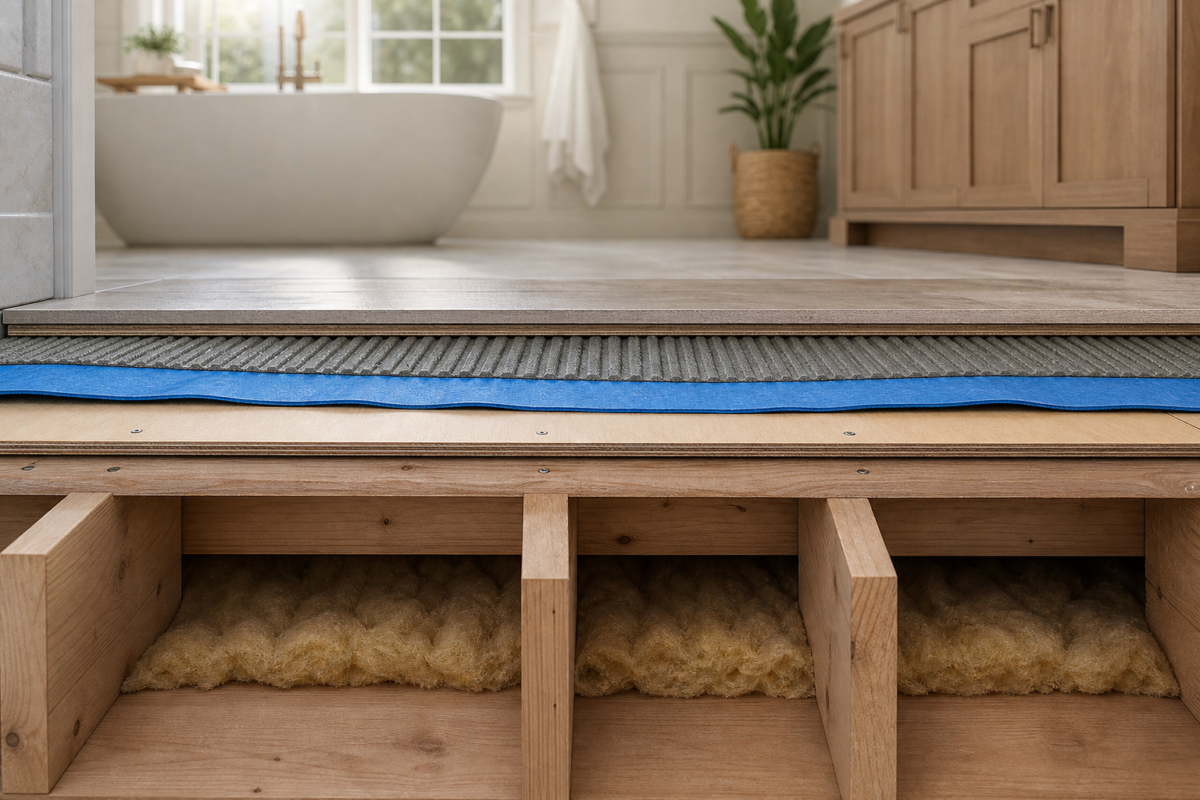
The subfloor is the structural wood or concrete deck fastened to the floor joists; it carries the load, and everything you see sits on top of it. Waterproofing is a separate job layered over that deck. Confusing the two is the most common homeowner mistake, because cement backer board is not waterproof on its own.
A typical wood-framed bathroom floor is a sandwich: joists, then a 3/4-inch plywood subfloor, then an underlayment or waterproofing layer, then thinset and tile. Water that gets past the tile and grout, which are not waterproof, needs that membrane layer to stop it. Without it, moisture wicks into the plywood, the glue delaminates, and the wood swells and rots. The EPA guidance on moisture and mold notes that persistent moisture behind finishes is the leading cause of indoor mold, which is both a health and a structural problem.
Bathrooms concentrate three water sources: splash from the shower and tub, condensation, and plumbing leaks at supply lines and the toilet flange. The floor around a curbless or zero-threshold shower is especially exposed, which is why those designs demand continuous membrane waterproofing across the whole wet zone, not just a shower pan.
How bathroom subfloor waterproofing works, layer by layer
Bathroom subfloor waterproofing works by placing a continuous, water-tight barrier between the finished floor and the structural deck, so any water that passes the tile is caught and either held or drained. The barrier is only as good as its seams, corners, and penetrations.
The structural layer
This is your joists and subfloor panels. For tile, the industry standard is a minimum 1-1/8 inch total subfloor thickness: a 3/4-inch tongue-and-groove plywood subfloor plus a 1/2-inch underlayment. The deck must be stiff, dry, and flat to within 1/8 inch over 10 feet before anything goes on top.
The waterproofing layer
This is the membrane that actually stops water: a liquid applied with a roller (RedGard, Mapei AquaDefense), a sheet membrane bonded in thinset (Schluter Kerdi), or an uncoupling membrane that both waterproofs and absorbs movement (Schluter Ditra). It must be continuous and lapped up the walls and curb inside the wet area.
The setting and finish layer
Thinset mortar bonds the tile to the membrane; grout fills the joints. Neither is a water barrier. Sealing grout slows absorption but does not replace the membrane underneath.
Bathroom subfloor waterproofing cost in 2026
Expect to spend $500 to $2,500 to waterproof a standard bathroom floor in 2026, or about $3 to $10 per square foot installed depending on the system and whether you include the shower. Replacing a rotted subfloor first adds $2 to $10 per square foot on top of that.
The table below shows typical material and installed ranges for a 40 to 60 square foot bathroom floor. Labor runs $40 to $90 per hour for a tile installer, and most floors take a crew half a day to a full day to prep and waterproof.
| System / task | Material cost | Installed cost | Best use |
|---|---|---|---|
| Cement backer board (1/2 in) | $0.60 – $1.10 / sq ft | $3 – $6 / sq ft | Rigid base under tile |
| Liquid membrane (RedGard) | $0.75 – $1.50 / sq ft | $2 – $5 / sq ft | Showers, wet floors |
| Sheet membrane (Kerdi) | $1.50 – $2.50 / sq ft | $5 – $9 / sq ft | Full waterproof shower |
| Uncoupling membrane (Ditra) | $2.00 – $3.50 / sq ft | $5 – $10 / sq ft | Crack isolation + waterproof |
| Subfloor replacement | $1.50 – $3 / sq ft | $2 – $10 / sq ft | Rotted or sagging deck |
| Full bathroom floor system | — | $500 – $2,500 total | Backer + membrane + tile prep |
These figures track with national remodeling data and are consistent with the waterproofing line items in a full bathroom renovation budget. If you are weighing whether to do this layer yourself, read our DIY vs. hiring a pro comparison first, because waterproofing is the task where mistakes are most expensive to undo.
Subfloor materials: plywood vs. OSB vs. concrete
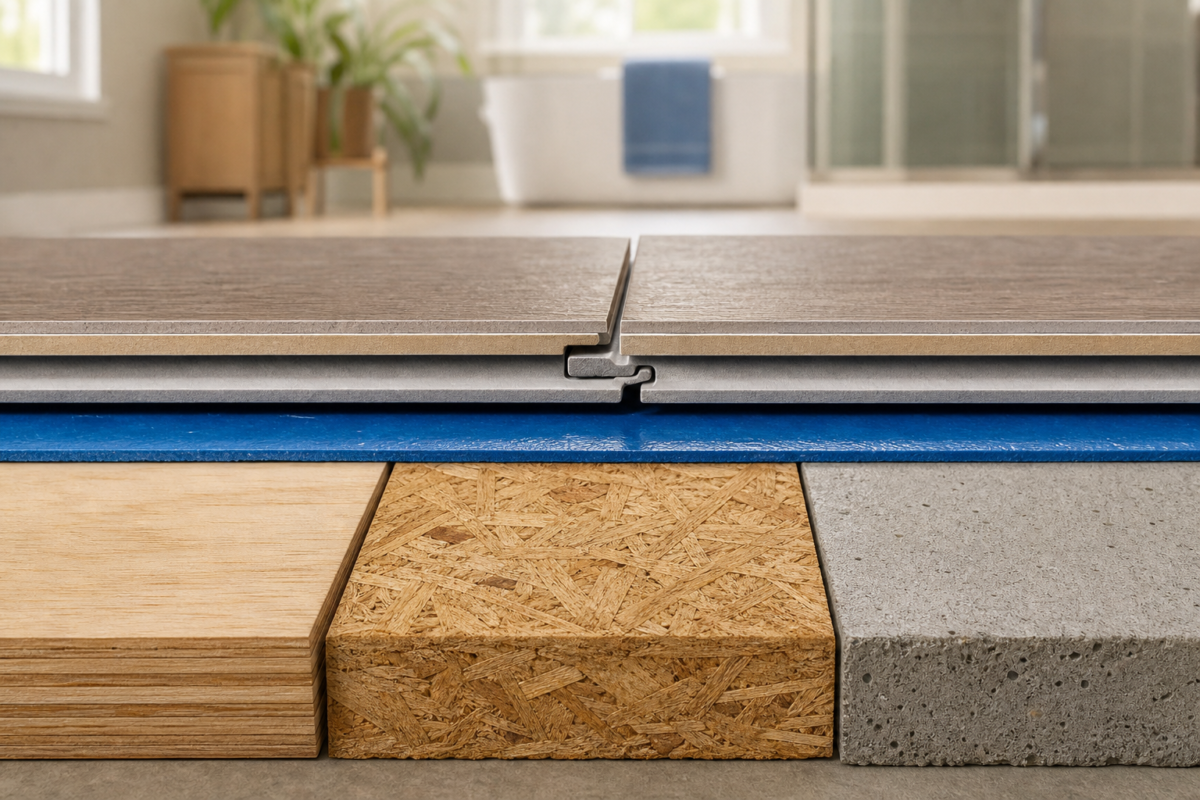
Exterior-grade plywood is the preferred subfloor under a tiled bathroom; OSB is permitted by code but handles moisture poorly, and concrete slabs need only crack isolation and a membrane. Choosing the right deck is step one of a durable floor.
Plywood
Use 3/4-inch (23/32) tongue-and-groove exterior-grade plywood (CDX or better) for the structural subfloor. It resists moisture far better than OSB and holds fasteners well. Add a 1/2-inch cement board or membrane on top before tile.
OSB (oriented strand board)
OSB is common in new construction and acceptable structurally, but its edges swell permanently when they get wet and it does not dry out. If you have OSB, waterproofing above it matters even more, and many installers add a layer of plywood underlayment for a more stable tile base.
Concrete slab
Slab floors do not rot, so the concern shifts to cracks telegraphing through the tile. Use an uncoupling or crack-isolation membrane, and apply a liquid waterproofer in the shower and around fixtures. Slabs are also the easiest base for a heated bathroom floor system.
Waterproofing systems compared: backer board, liquid, and sheet membranes
Cement backer board provides a rigid base but is not waterproof; a liquid or sheet membrane applied over or in place of it is what seals the floor. The best systems pair a stable base with a continuous membrane.
The Tile Council of North America publishes the Handbook methods and ANSI standards (A118.10 for waterproofing, A118.12 for crack isolation) that define a code-compliant assembly. Matching your product to the right method number is how pros guarantee the work.
Cement backer board
Brands like HardieBacker and Durock give tile a dimensionally stable, rot-proof base. They absorb water but will not degrade. In a shower, backer board must be covered with a membrane or a vapor barrier behind it; on a plain floor it is often topped with a liquid membrane.
Liquid-applied membranes
RedGard and similar roll-on products are the most popular DIY-friendly waterproofing. You apply two coats (the color change tells you it has cured), reinforcing corners and seams with fabric tape. Coverage is roughly 50 to 60 square feet per gallon for waterproofing.
Sheet and uncoupling membranes
Schluter Kerdi (waterproofing) and Ditra (uncoupling plus waterproofing) are bonded in thinset with sealed seams. They cost more and have a learning curve, but deliver the most reliable, warrantied wet-area protection and tolerate slight substrate movement that would crack tile set on a rigid base.
Signs your bathroom subfloor is failing
Soft or spongy spots, flexing tile, cracked grout lines, a musty smell, and a toilet that rocks are the clearest signs of a water-damaged subfloor. Catch these early and you replace a few sheets of plywood; ignore them and you replace joists.
- Floor feels soft, bouncy, or spongy near the tub, toilet, or vanity.
- Tiles crack or grout lines open repeatedly even after repair.
- A persistent musty or damp odor you cannot trace.
- The toilet rocks or the base shows staining or a loose flange.
- Visible water stains or sagging on the ceiling below the bathroom.
- Peeling vinyl, curling plank edges, or discolored baseboards.
If you see several of these together, open the floor before tiling. Discovering rot after new bathroom flooring is installed means paying for the same work twice.
Step by step: building a waterproof bathroom floor
A pro builds a waterproof floor in a fixed order: repair the deck, set backer or membrane, waterproof wet zones continuously, then tile. Skipping or reversing steps is what causes failures.
1. Inspect and repair the deck
Pull the old flooring, check for soft spots, and replace any damaged plywood. Confirm joist spacing and stiffness meet the deflection target for your tile before going further.
2. Install the base layer
Set 1/2-inch cement board in a bed of thinset and screw it down, or roll out an uncoupling membrane into thinset. Stagger seams and keep them off the subfloor joints.
3. Waterproof the wet zone
Apply liquid membrane or sheet membrane across the shower pan, curb, and at least 6 to 12 inches up the walls. Reinforce every inside corner, drain, and pipe penetration with membrane fabric. This is the step that actually stops water.
4. Tile and grout
Set tile in the correct thinset for your membrane, then grout and seal. For layout and material choices, our bathroom tile guide covers the finish side in depth.
Contractor’s take
The floors I get called back to fix are almost never the open floor field; they are the transitions. Where the tile meets the tub, where the curb turns up, and around the drain and toilet flange. Spend your extra membrane and reinforcing fabric there. I flood-test every shower pan for 24 hours before tiling, and I waterproof a strip of the main floor in front of the tub and vanity even when code does not require it. That $40 of liquid membrane has saved more subfloors than any single tool in my truck.
Deflection, slope, and code requirements
Tile floors must meet an L/360 deflection limit for ceramic and porcelain and a stricter L/720 for natural stone, and shower floors must slope 1/4 inch per foot to the drain. These are the structural rules behind a crack-free, well-draining floor.
Deflection measures how much the floor flexes under load; too much movement cracks tile and breaks the waterproofing bond. If your joists are undersized or widely spaced, add blocking or sister the joists before tiling stone. Local code also requires permits for plumbing moves and, in many jurisdictions, inspection of shower pan waterproofing before tile. Always confirm requirements with your building department.
Your next move
You know the number. What are you deciding next?
Walk-in tub cost in 2026: $5,000 to $20,000 installed. Compare tub types, features, and the real Medicare coverage…
Continue →Bathroom remodel financing explained: compare home equity loans, HELOCs, cash-out refi, personal loans, and 0% cards with 2026…
Continue →Steam shower cost runs $3,000 to $10,000 installed in 2026. See prices by generator size, enclosure, and prefab…
Continue →Frequently asked
Is cement backer board waterproof?
No. Cement board is dimensionally stable and will not rot, but water passes right through it. You must add a liquid or sheet membrane over or behind it in wet areas for true waterproofing.
Do I need to waterproof the whole bathroom floor or just the shower?
The shower pan, curb, and surrounding walls must be fully waterproofed. The open floor is lower risk, but waterproofing a strip in front of the tub, shower, and toilet is cheap insurance against splash and slow leaks.
Can I tile directly over plywood?
It is not recommended. Plywood expands and contracts with moisture and can crack the tile. Always add cement board or an uncoupling membrane plus waterproofing between the plywood and the tile.
How much does it cost to replace a rotted bathroom subfloor?
Budget $2 to $10 per square foot installed, or roughly $500 to $2,000 for a typical bathroom, more if joists are damaged. Catching rot early keeps it at the low end.
RedGard or Schluter Kerdi, which is better?
RedGard is cheaper and DIY-friendly for floors and showers. Kerdi and Ditra cost more but offer warrantied, more forgiving performance and crack isolation. For a high-end or curbless shower, the sheet systems are worth it.

Figures reflect 2026 US material and installed ranges from national remodeling and tile-industry data.