Bathroom Tile Patterns and Layouts: 2026 Guide
From running bond to herringbone, here is how each bathroom tile pattern affects cost, difficulty, and the way your space feels.

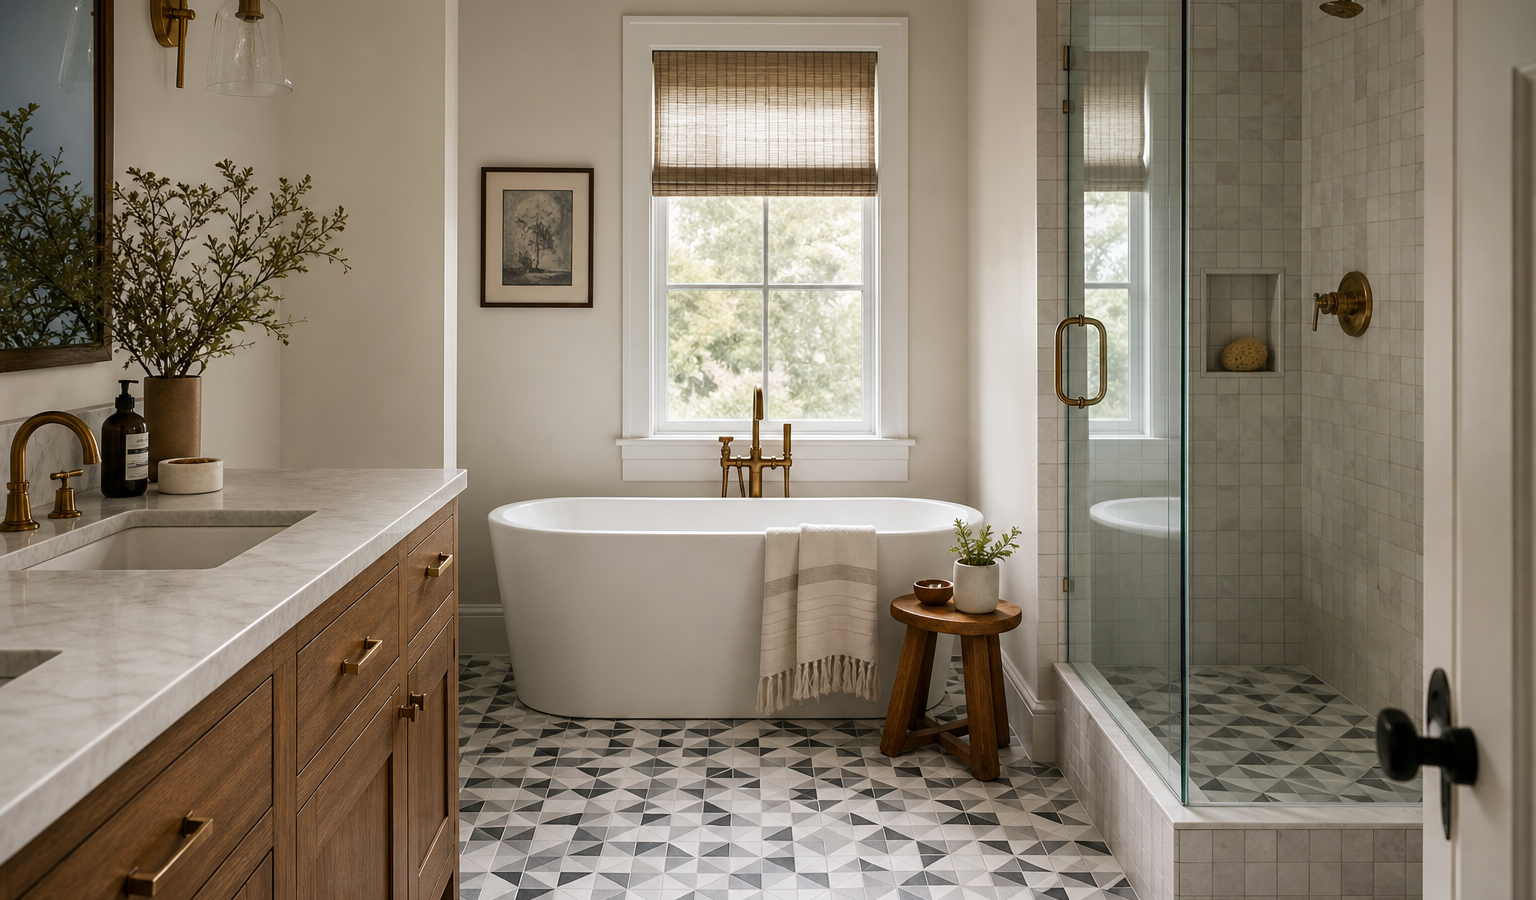
Choosing among bathroom tile patterns is one of the highest-impact decisions in any bath remodel, because the layout you pick shapes how large the room feels, how much labor you pay for, and how the space reads for the next decade. The same white subway tile looks builder-basic in a plain grid and genuinely custom in a herringbone. This guide breaks down the most popular bathroom tile patterns used in US homes in 2026, what each layout costs to install, where each one performs best, and how to match a pattern to your room size, tile shape, and budget. Expect real price ranges, installer-tested advice, and a planning checklist you can hand straight to your contractor.
Pattern is not just decoration. A diagonal floor can make a cramped powder room feel wider, a vertical stack can lift a low ceiling, and a busy mosaic can turn a plain niche into a focal point. Before you fall for a photo, understand the tradeoffs in cost, waste, and difficulty behind each look. If you are still setting a budget, start with our bathroom remodel cost guide and bathroom tile cost breakdown so the tile line fits the bigger picture.
Key takeaways
- Straight-lay and running-bond layouts are the cheapest to install; herringbone, chevron, and Versailles add 20 to 30 percent to labor.
- Complex patterns waste 15 to 20 percent of your tile on cuts, so order more overage than the standard 10 percent.
- Small bathrooms look larger with large-format tile, diagonal floors, or a single continuous pattern and thin grout lines.
- Match the pattern to the surface: vertical stack and herringbone shine on walls; hexagon, penny, and mosaic grip best on shower floors.
- Grout color and line width change a pattern as much as the tile itself; sample both before committing.
What are the most popular bathroom tile patterns?
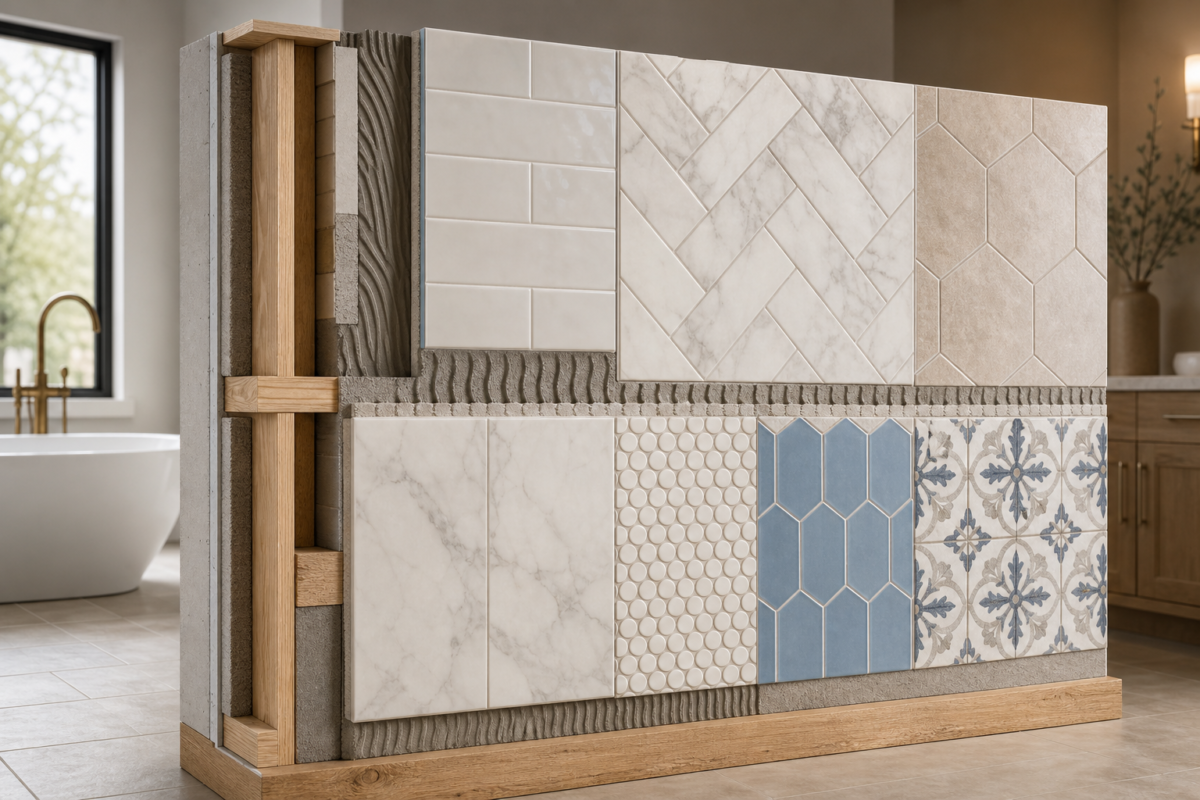
The most popular bathroom tile patterns in 2026 are running bond (offset brick), straight lay (grid), vertical stack, herringbone, chevron, diagonal, basketweave, Versailles, and small-format looks like hexagon, penny, and mosaic. Running bond and straight lay dominate walls because they are affordable and timeless, while hexagon and penny lead on shower floors because the extra grout lines add slip resistance.
Each pattern falls into one of three effort tiers. Simple layouts (grid, running bond, stacked) install fastest and cost the least. Medium layouts (diagonal, basketweave, pinwheel) need more cuts. Complex layouts (herringbone, chevron, Versailles, mosaics) demand the most skill and generate the most waste. Knowing the tier tells you what to expect on a labor quote before an installer walks the room.
How pattern changes the feel of a small bathroom
In a compact bath, the pattern does real spatial work. Diagonal floor tile draws the eye to the longest dimension and blurs the walls, so the footprint reads bigger. Large-format tile with minimal grout keeps the surface calm and enlarges the space visually. Vertical stack or vertical subway pulls the eye upward and makes an eight-foot ceiling feel taller. Save the busiest patterns for one accent wall or the shower niche so the room does not feel cluttered.
How much do bathroom tile patterns cost to install?
Expect to pay roughly $13 to $40 per square foot installed for standard ceramic and porcelain in a simple layout, and 20 to 30 percent more when you choose a complex pattern like herringbone or Versailles. Labor alone runs about $5 to $15 per square foot in most US markets in 2026, and the pattern you pick is the single biggest lever on that labor number after tile size.
Two hidden costs surprise homeowners. First, complex patterns waste 15 to 20 percent of your tile on angled cuts, versus about 10 percent for a grid. Second, natural stone, glass, and mosaic cost far more than ceramic per square foot before any pattern premium. The table below shows typical installed pricing by tile type in a standard layout; add the complexity surcharge for angled patterns.
| Tile type | Material only (sq ft) | Installed (sq ft) | Best patterns |
|---|---|---|---|
| Ceramic | $8 – $15 | $13 – $30 | Grid, running bond, diagonal |
| Porcelain | $12 – $25 | $17 – $40 | Herringbone, vertical stack, large-format |
| Natural stone | $18 – $65 | $23 – $80 | Versailles, checkerboard, basketweave |
| Glass | $20+ | $25+ | Vertical stack, mosaic accent |
| Mosaic / penny | $30+ | $40+ | Shower floors, niches, feature strips |
For the demolition, waterproofing, and substrate work under these numbers, see our detailed bathroom tile cost guide, and use our bathroom remodel cost guide to decide where the money is best spent.
Straight lay and stacked tile layouts
Straight lay and stacked layouts are the simplest and most budget-friendly bathroom tile patterns, aligning every tile in a clean grid with continuous horizontal and vertical grout lines. They install fast, waste little tile, and read as calm and modern, which is why they pair so well with large-format porcelain.
Straight lay (grid) pattern
The grid places square or rectangular tiles in perfectly aligned rows and columns. It is the lowest-labor option and the most forgiving of DIY, but it is also unforgiving of crooked walls, because any drift in the grout lines is immediately visible. Grid works best with large-format tile (12 by 24 inches and up), where fewer grout lines create a seamless, spa-like surface. Keep grout close to the tile color to make the field disappear.
Vertical and horizontal stack
A stacked layout is a grid turned into a design statement. Stacking rectangular tile vertically elongates the wall and lifts the ceiling, a favorite trick in small and windowless baths. Horizontal stacking widens a narrow wall. Both are crisp and contemporary, but they demand dead-straight installation because the aligned joints magnify any error. Use a laser level and pick a tile with rectified (precision-cut) edges for the tightest lines.
Running bond and subway tile patterns
Running bond, also called the offset or brick pattern, staggers each row of rectangular tile so the joints land at the center of the tile below, and it is the default layout for classic subway tile. It hides minor wall imperfections better than a grid, costs little more to install, and never goes out of style.
Classic 50 percent offset
The traditional running bond offsets each row by half a tile, giving that familiar subway-station look. It is beginner-friendly, wastes only about 10 percent of tile, and flatters everything from a tub surround to a full shower. Because the eye follows the horizontal lines, it can make a narrow bathroom feel wider. Choose contrasting grout for a graphic look or matching grout for something softer.
One-third offset and vertical subway
A one-third offset (33 percent) is a subtle modern update that avoids the lippage long tiles can have with a 50 percent offset. Running subway vertically adds height and a fresh twist. Both keep the affordability of standard subway while looking more custom, making them top value patterns in 2026.
Herringbone and chevron tile patterns
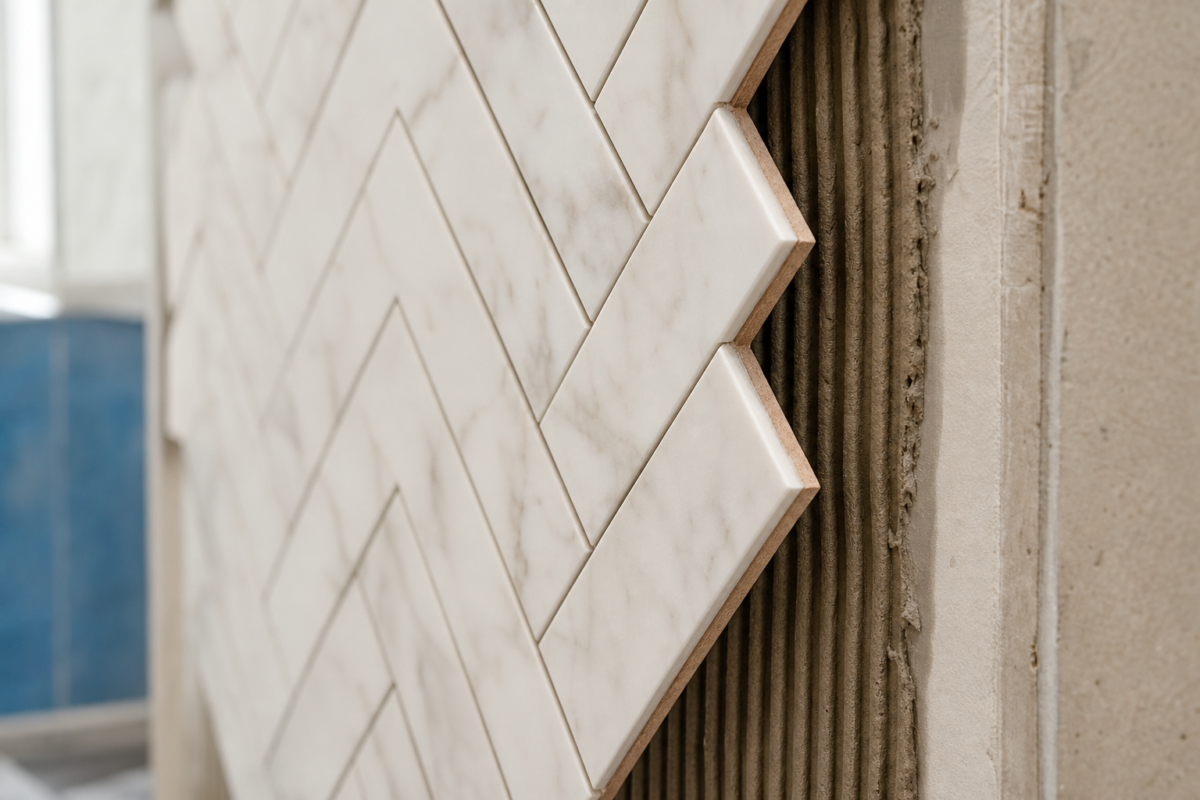
Herringbone and chevron are the two most popular statement patterns, arranging rectangular tiles into a dynamic zigzag that adds movement and a high-end, custom feel. Both carry a labor premium of roughly 20 to 30 percent and higher tile waste, but they turn an ordinary material into a focal point.
Herringbone
Herringbone lays rectangles at 90-degree angles in a broken zigzag. It is stunning on shower walls, feature walls, and floors, and works with everything from marble to inexpensive ceramic. The catch is labor: the angled cuts take time and skill, and you should order 15 to 20 percent overage. A 45-degree herringbone feels even more dramatic in a shower.
Chevron
Chevron looks similar but differs in a key way: the tile ends are cut at an angle so they meet in a continuous, unbroken V. That mitered cut makes chevron pricier and more demanding than herringbone, and usually requires tile milled for the pattern. The payoff is a sleek, arrow-like line that suits contemporary baths.
Diagonal, basketweave, and Versailles patterns
Diagonal, basketweave, and Versailles are mid-to-complex patterns that add visual interest without the strict repetition of a grid. Diagonal is the small-bathroom secret weapon, basketweave brings vintage charm, and the Versailles pattern uses mixed tile sizes for an organic, old-world floor.
Diagonal (45-degree) layout
Turning square tile 45 degrees creates a diamond field that makes a small bathroom feel larger by leading the eye to the corners and longest sightlines. It costs a bit more than a grid because of perimeter cuts and roughly 15 percent waste, but the spatial payoff in a powder room is worth it. Diagonal also disguises rooms that are slightly out of square.
Basketweave
Basketweave interlocks pairs of rectangular tiles to mimic a woven basket, a look rooted in 1920s baths. Often sold as pre-assembled sheets, it speeds installation and pairs beautifully with hexagon or penny floors for a period-correct scheme in traditional and transitional designs.
Versailles (French pattern)
The Versailles pattern combines four tile sizes in a repeating, seemingly random module, most often in stone like travertine or limestone. It creates a relaxed, estate-floor look with no obvious grid, which hides wear over large areas. It is labor-intensive to set out, so it belongs in the complex tier on your budget.
Mosaic, penny, and hexagon floor patterns
Small-format patterns like mosaic, penny round, and hexagon are the go-to for shower floors because their many grout lines provide the slip resistance and drainage slope that large tiles cannot. They also make striking accents on walls and niches.
Hexagon
Hexagon tile ranges from tiny 1-inch mosaics to bold 8-inch and larger formats. Small hex is a classic, grippy shower-floor surface that molds easily to a sloped drain; large hex reads as modern and graphic on walls and floors. Marble hex remains a top pick for a timeless, high-end bath in 2026.
Penny round and mosaic
Penny round tile delivers a playful, texture-rich floor with excellent traction, ideal for showers and vintage schemes. Broader mosaic patterns, sold on mesh-backed sheets, add color or a custom design to niches and feature walls with far less labor than setting each tile by hand. Sheets still need careful alignment and grouting, so budget more than a plain field.
How to choose a tile pattern by room size and location
Choose your pattern by matching the layout to the room size, the surface, and how much attention you want it to draw. As a rule, use bold patterns on a single feature area, keep the rest simple, and let small tiles handle wet floors while large-format handles big walls.
The factors below show, at a glance, how the main patterns rank on the tradeoffs that matter most: installed cost, tile waste, difficulty, and how much a small room benefits. Use them to shortlist a layout before you price it.
Matching pattern to the surface
Floors need traction and a slope to the drain, so small hex, penny, and mosaic win in showers, while large-format and diagonal suit dry floors. Walls can carry the drama: herringbone, chevron, and vertical stack look their best above the waistline. Running a single large-format tile from floor to wall makes even a small bathroom feel expansive. Coordinate the scheme with your vanity choice and bathroom paint colors so finishes read as one design.
Contractor’s take
Buy your tile before you finalize the pattern, not after. Angled layouts like herringbone and chevron need 15 to 20 percent overage, and dye-lot color shifts between boxes are common. I order everything at once, dry-lay the first few square feet on the floor, and confirm the pattern and grout gap with the homeowner before a single tile is thinset. That ten-minute mockup prevents the most expensive mistake in tile work: tearing out a wall because the pattern looked different in real light than it did on a phone screen.
Planning grout, tile size, and layout details
Before you commit, lock down three details that change a pattern as much as the tile itself: grout color and width, tile size and edge type, and the layout start point. Getting these right separates a custom result from an amateur one.
Grout is not an afterthought. A contrasting grout turns a simple running bond into a graphic feature; a matching grout lets a busy pattern read as calm texture. Thin grout lines (1/16 to 1/8 inch) with rectified tile look modern and make small rooms feel bigger. Installation standards from the Tile Council of North America cover substrate, movement joints, and slope-to-drain requirements worth referencing in your contract. For material selection beyond patterns, our bathroom tile guide covers types, sizes, and finishes.
- Confirm tile size and whether edges are rectified for tight, even grout lines.
- Choose grout color and joint width, and view a sample board in the room’s real light.
- Order 10 percent overage for grids and 15 to 20 percent for herringbone, chevron, or diagonal.
- Decide the layout start point so cuts land in the least visible corners.
- Verify slip resistance (DCOF rating) for any tile going on a shower or wet floor.
- Ask your installer to dry-lay and photograph the first section before setting.
Certified designers through the National Kitchen and Bath Association can help finalize a scheme, and pairing the right pattern with the right shower versus bathtub decision keeps the whole bathroom cohesive.
Bathroom tile pattern FAQ
Your next move
You know the number. What are you deciding next?
See 2026 curbless shower cost, how it is built, drain and slope requirements, and how to avoid leaks…
Continue →Compare bathroom sink types, vessel, undermount, pedestal, and wall-hung, with pros, cons, materials, and 2026 installed costs.
Continue →Heated bathroom floor cost in 2026: real per square foot prices, electric vs hydronic, install steps and running…
Continue →Frequently asked
Which bathroom tile pattern is cheapest to install?
Straight lay (grid) and running bond are the least expensive because they need the fewest cuts and the least layout time. They waste only about 10 percent of tile versus 15 to 20 percent for angled patterns, so you save on both labor and material.
What is the difference between herringbone and chevron?
Herringbone lays rectangular tiles at a 90-degree angle so they form a broken zigzag, using standard tile. Chevron cuts the tile ends at an angle so they meet in a continuous, unbroken point, which needs specially cut tile and costs more to install.
What tile pattern makes a small bathroom look bigger?
Large-format tile with thin, matching grout, a diagonal floor layout, or a single continuous pattern from floor to wall all enlarge a small bathroom. Vertical stack or vertical subway adds height to a low ceiling.
Do complex tile patterns cost more?
Yes. Patterns like herringbone, chevron, and Versailles typically add 20 to 30 percent to labor and require 15 to 20 percent more tile for cuts, so budget accordingly when comparing quotes.
What is the best tile pattern for a shower floor?
Small-format tile such as 1- or 2-inch hexagon, penny round, or mosaic is best for shower floors because the extra grout lines add slip resistance and flex around the slope to the drain.

Installed prices reflect 2026 US market ranges for materials and labor; complex patterns add 20 to 30 percent labor.